
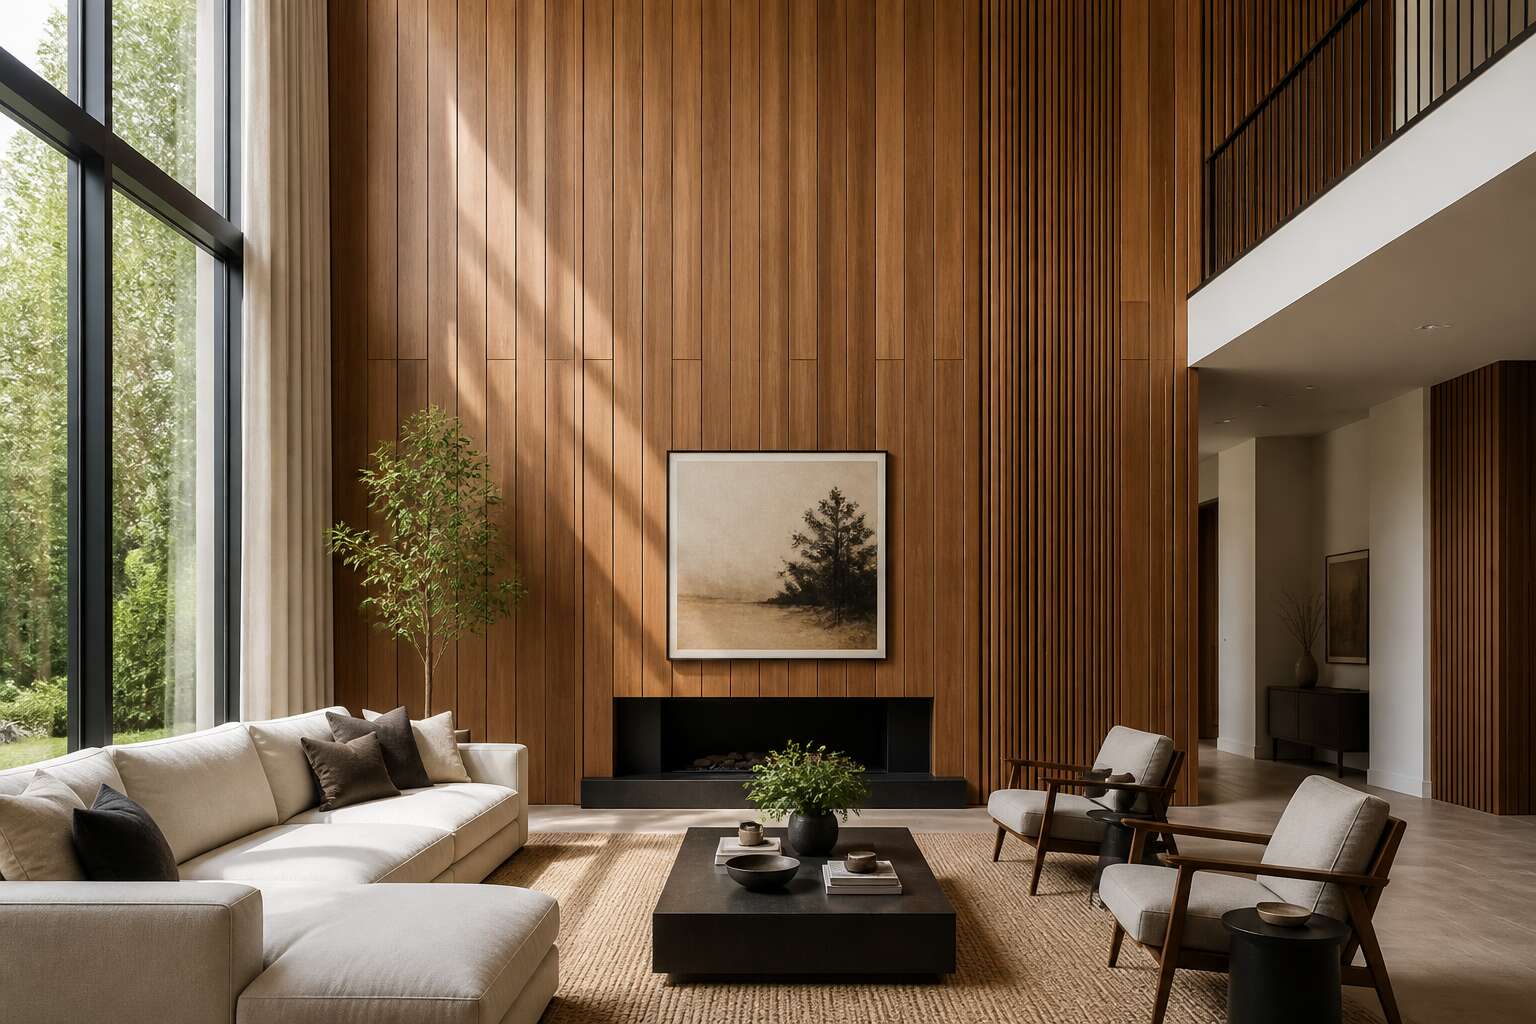
Understanding Standard Cladding Dimensions
Key Factors That Influence Overall Cladding Size
Standard cladding dimensions rarely follow a universal rule. The 2.4 metre ceiling height common in South African homes provides a baseline, but commercial projects frequently surpass 4.5 metres. Understanding the wall cladding height for your specific facade requires a clear look at external pressures.
- Structural load bearing capacity
- Wind uplift resistance, especially in coastal provinces
- Aesthetic continuity with adjacent buildings
- Manufacturer installation limits
Each factor alters the size. For instance, a lightweight aluminium composite panel tolerates a higher installation than a dense stone veneer. I always advise checking the substrate condition first; an uneven wall changes the effective mounting height, and that subtle shift in wall cladding height can compromise the entire system.
Residential vs Commercial Installation Standards
A residential facade at 2.4 metres and a commercial curtain wall at 6 metres share a name, but they obey different rules. Standard cladding dimensions in South Africa split along this line. The National Building Regulations apply to both, yet the interpretation shifts dramatically with scale and occupancy.
For homes, wall cladding height typically mirrors internal ceiling heights. For commercial projects, you’re designing for wind pressure coefficients that change every few storeys. The practical differences include:
- Residential: simpler edge details, fewer expansion joints
- Commercial: engineered movement allowances, stricter fire ratings
I’ve watched installers carry residential assumptions into commercial work, and the consequences show up in failed inspections. Wall cladding height must correlate with the building’s certificate of occupancy, not merely the architectural drawing.
Common Building Code Requirements You Should Know
Specifying the correct wall cladding height begins with the South African National Building Regulations, yet many contractors only consult the SANS 10400 tables after a dispute arises. The regulations specify minimum heights for weatherproofing, but they do not define the maximum. That distinction matters because standard cladding dimensions often exceed the code minimum for aesthetic continuity. I have seen plans where the wall cladding height on a gable end creates a hidden cavity, trapping moisture behind the facade. The code requires ventilation at specific intervals, and those intervals change with the cladding material.
- Fibre cement boards need 12 mm clearance from the ground.
- Timber cladding requires a 150 mm minimum height above finished ground level.
- Rendered masonry often skips the cavity entirely.
Each of these choices affects the final wall cladding height on the compliance certificate.
How Vertical Scale Impacts Architectural Proportion
Standard cladding dimensions rarely align with the proportions your elevation demands. A 300 mm board width repeated across a 2.4 m storey height creates a different visual effect than the same board on a 3.6 m double volume. The wall cladding height determines whether that repetition reads as deliberate or accidental.
I have seen facades where the vertical scale fights the material, and the result is never subtle! Fibre cement planks in 1.8 m lengths on a gable that rises 4 metres require horizontal joints that land awkwardly mid-window. The solution is not always taller cladding. Sometimes it is a reconsidered layout.
- Measure the visible area first, then select board lengths
- Align joints with window heads or sills
- Check offcut waste against the budget
The wall cladding height reads first. It sets the proportion for every window and roofline above it.
Measuring and Calculating Installation Requirements
Step-by-Step Guide to Measuring Your Exterior Wall Surface
One millimetre of error in your vertical measurement multiplies across every cladding panel you order. The wall cladding height determines the number of panels required, so precision matters from the very first reading. Start by dividing the exterior wall surface into rectangular sections, since most cladding systems demand clean, straight reference lines. Measure each section from the foundation to the intended top edge and record every value in millimetres.
Follow this sequence for accurate calculations:
- Measure the width and height of each wall section.
- Subtract openings such as windows and doors.
- Add the overlap allowance for your chosen panel profile.
- Convert the final figures to square metres.
This method yields the true wall cladding height for ordering materials. Before committing to your figures, verify the level of the existing substrate, because uneven surfaces will shift the final dimensions.
Estimating Material Quantities and Coverage Ranges
One misjudged ridge line can leave you with a stack of cut sheets that will never fit properly. Installation requirements shift once the wall cladding height passes certain thresholds. A 3 metre elevation demands different scaffolding and bracing than a 6 metre gable end. The coverage range printed on each pack assumes a flat, plumb substrate, but rural Free State walls rarely cooperate. Measuring for material quantities means translating your recorded dimensions into panel counts, not just square metres.
The wall cladding height also dictates overlap allowances. Some profiles use 30 mm overlaps, others 50 mm, and this difference multiplies across the full elevation. When you estimate cladding requirements, factor in wastage of ten to fifteen percent for cut edges and offcuts.
A practical approach is to calculate each section, then compare totals against the supplier’s coverage chart. Installers often order from the same batch to avoid colour variation. For a typical double storey home, expect the cladding elevation to consume roughly 1.1 times the footprint when accounting for overlaps and waste.
Accounting for Waste, Trim, and Irregular Openings
It is often the window and door openings, not the sheer vertical run, that quietly consume your cladding budget. A single gable with three dormers can require more linear metres of trim than an entire uninterrupted elevation. The discrepancy between the supplier’s square metre rate and your actual material list widens sharply once you start accounting for flashings, corner trims, and J-channels around every fenestration.
Precise measurement becomes a discipline of its own. You trace each opening’s perimeter, noting the sill and head flashings that add another 150 mm on each side. The wall cladding height influences these details; taller walls need expansion joints at certain intervals, and every joint introduces both a cut and a connection piece. Standard practice follows a methodical sequence:
Perimeter measurements for each wall section
Deductions for each opening over one square metre
Additions for every internal and external corner
Supplementary lengths for starter strips and top channels
Treat the trim as the primary material, then order the sheeting. This approach prevents the costly mistake of buying panels first and discovering later that the edge profiles alone cost more than ten percent of the project. Builders in the highveld know that proper measurement protects the budget from the inevitable surprises of uneven foundations and non-standard eaves.
Vertical vs Horizontal Panel Orientation Effects
Panel orientation changes the arithmetic before a single sheet is cut. The wall cladding height of a gable end, measured from foundation to apex, behaves differently under vertical cladding than under horizontal. Vertical boards run the full rise, which means fewer horizontal joints but longer, heavier sheets and more waste at the eaves. Horizontal boards let you stagger shorter lengths, yet every course introduces a new seam and a new trim calculation.
The measurement sequence shifts accordingly. One must record:
- Full vertical runs for the apex, subtracting only the gable returns
- Course counts and reveal spacing for the horizontal layout
- The overlap allowance at every internal angle
I have watched two estimators produce wildly different material lists from the same elevation, simply because one measured for vertical installation and the other measured for horizontal. The orientation determines the cut plan, and the cut plan determines the order.
Handling Multi-Story and Cathedral Ceiling Scenarios
Multi-story elevations change how you approach wall cladding height at each transition. A cathedral ceiling adds a second measurement layer, because the interior volume demands continuous cladding that follows the roof pitch rather than stopping at a floor line. The exterior wall cladding height for a two-story gable must therefore combine the floor-to-floor rise with the raking length to the apex.
– Record each floor’s elevation separately before summing the total.
– Measure the rake angle from the top plate to the peak for cathedral spaces.
– Verify the scaffold access height, since it alters the reachable measuring position.
I treat every floor line as its own reference point, never assuming the levels align. A single misread at the upper floor throws off every subsequent calculation, so confirm each dimension twice before finalizing the material list.
Code Compliance and Safety Considerations
Fire Resistance Ratings and Necessary Material Thickness
Fire does not wait for compliance paperwork. The higher your wall cladding height extends, the more demanding the fire resistance requirements become. In South Africa, SANS 10400 Part T sets the rules. Those rules change based on how high the cladding rises. A low-rated panel might pass at ground level but fail catastrophically on a second storey!
Material thickness is the variable most people ignore. Thicker aluminium composite panels with mineral cores resist heat transfer longer. Thinner, cheaper options often hide polyethylene cores that melt and drip burning residue. The relationship between wall cladding height and required thickness is not arbitrary; it is calculated based on fire load and evacuation time.
Here is what we review before approval:
- Fire test reports from SANAS accredited laboratories
- Core material classification, A2 or better
- Maximum storey height permitted for the specific panel
- Thermal expansion properties at high temperatures
Your cladding must align with materials tested for that exact application. Shortcuts cost lives.
Wind Load Calculations and Structural Support Needs
A wall cladding height that appears modest at ground level can generate surprising wind forces as it rises. South African building regulations require structural calculations for any facade above 6 metres, and those calculations become more demanding as the cladding climbs higher. Compliance with SANS 10160 is not a formality; it determines the bracket spacing, fixing depth, and frame thickness that keep the wall attached to the building.
- Substrate material and its load bearing capacity
- Bracket strength and corrosion resistance
- Maximum spacing of vertical supports
- Allowance for thermal expansion of the cladding
Wind load increases with wall cladding height because taller buildings experience faster wind speeds without ground friction. Engineers use pressure coefficients for the specific location, not generic estimates. A structural support system that works for a single storey may fail at two storeys, especially along corners and gable edges. The mass of the cladding also adds dead load, which the frame must carry during static and dynamic conditions. This is why the engineer’s seal matters!
Moisture Barriers, Ventilation, and Condensation Control
In South Africa, the relationship between wall cladding height and moisture control becomes unforgiving as facades climb. A taller wall cladding height means more horizontal seams, more fixing penetrations, and more opportunities for wind-driven rain to find a weak point. Neither aesthetic appeal nor structural calculations will save a building when water finds its way behind the skin. The regulations that govern this matter concern the drying capacity of the entire assembly.
Moisture barriers must be continuous behind the cladding, yet a barrier alone is never the solution. Ventilation spaces allow interstitial moisture to escape, protecting the substrate from premature decay. Condensation control depends on the equilibrium between the interior vapour drive and the external air film, a balance that shifts as wall cladding height increases and thermal bridging changes the dew point dynamics.
Consider these essentials from the South African context:
1. Ensure the cavity depth accommodates proper drainage
2. Install vapour-permeable membranes on the warm side of the insulation
3. Seal all perimeters, not just the top edge
Neglecting these provisions invites insidious failures that no fixing schedule can prevent.
Local Zoning Laws and Setback Restrictions
Cape Town’s zoning scheme allocates twelve pages to building height planes, yet many disputes between neighbours begin with a tape measure and a grievance. In South Africa, exterior wall cladding height is a structural decision and a legal transaction. The National Building Regulations may approve the assembly, but the local town planning scheme controls whether that assembly may rise at all.
The practical steps for compliance depend on your district, but they follow a pattern:
- Measure the natural ground level at each corner of the building before calculating cladding thickness
- Confirm the building line setback, since a projecting cladding profile can breach the boundary line even when the wall itself complies
- Apply for a departure if the proposed wall cladding height exceeds the zoning scheme’s height plane
Each of these considerations has its own appeal process, and none of them defer to engineering logic.
Accessibility Guidelines for Public and Commercial Spaces
Accessibility guidelines add another layer to the wall cladding height conversation. In public and commercial spaces, a projecting cladding profile can become a hazard for visually impaired pedestrians. The SANS 10400 regulations require that the cladding assembly be assessed against tactile paving and clear path zones. Consider these checks for compliance:
– Protrusion limits: any projection beyond 100mm from the wall face may need a visual contrast
– Headroom requirements: the cladding must maintain a minimum clear height above walkways
– Wayfinding integration: the cladding must align with tactile ground surface indicators
For commercial buildings, the interaction between cladding and accessible routes affects emergency egress. A wall cladding height that satisfies the zoning scheme might still block a required exit path. The material’s fire resistance rating also matters in these accessible spaces.
Seismic and Extreme Weather Adaptations
Code compliance becomes a peculiar beast when the ground starts shaking. In seismic zones, the wall cladding height dictates how much a facade can flex without turning into a kinetic hazard. SANS 10400 expects the cladding assembly to move as a unit, not as individual missiles. A taller wall cladding height increases the leverage on anchor points, so brackets need to handle both vertical gravity loads and lateral racking forces.
Extreme weather adds another layer of mischief. A soaring wall cladding height means more thermal movement, which means expansion joints must be spaced with real intent. When the sun hammers a north-facing facade, the panels want to grow. If the height forces a rigid connection, something cracks.
For seismic and thermal resilience, keep these adaptations in mind:
- Slotted fixing holes to permit in-plane movement
- Structural silicone joints that absorb cyclic stress
- Reinforced jambs at every floor line
The wall cladding height should always be checked against the building’s designed movement capacity. A panel that looks flawless on a calm day might pop its fixings during a tremor. Verify the engineer’s calculations, then add a margin for the weather that the engineer did not expect. That is how you avoid a very expensive surprise.
Design Trends and Stylistic Options
Full Coverage vs Partial Accent Wall Approaches
In Johannesburg’s northern suburbs, I have watched homeowners transform flat facades into textured statements. The choice between full coverage and a partial accent wall fundamentally alters how a structure relates to its environment. Full coverage cladding, extending from ground level to roof eaves, creates a monolithic presence that reads as intentional and complete. This approach works particularly well for contemporary farmhouse aesthetics or coastal properties in the Western Cape where weather protection demands complete enclosure.
Partial cladding, by contrast, introduces rhythm and visual pause. A cladding band at mid-height, perhaps terminating just below window sills, draws the eye horizontally and can make a sprawling single storey home feel more grounded. This approach allows you to pair materials, such as timber slats over painted brick, without overwhelming the original architecture.
Consider these advantages of partial accent installations:
– Reduced material costs while still delivering visual impact
– Easier maintenance access to upper wall surfaces
– Flexibility to refresh the look by repainting unclad portions
The vertical termination point matters as much as the material itself. A crisp, straight edge at the top of your cladding suggests precision, while a stepped or staggered edge creates a more organic, handcrafted feel. In Cape Town’s windy coastal belts, many designers now terminate cladding at a higher point to protect exposed gable ends. Your wall cladding height ultimately becomes a design signature, a line that either anchors the building to the earth or lifts it toward the sky. Make this decision with an eye on both the immediate visual harmony and the long-term character of your home.
Mixing Different Materials and Texture Depth
Design trends in South Africa now lean toward blending materials at a single wall cladding height rather than committing to one skin. Stacked stone bases give way to vertical timber slats, or fibre cement panels meet corrugated steel with a deliberate gap for shadow line. The effect is texture depth that shifts as the sun moves across the facade.
When mixing materials, the termination point of each layer matters. A timber band ending at the same wall cladding height as a stone plinth creates a neat datum. Alternatively:
- Offsets of 200 to 300 millimetres between materials add shadow and visual weight,
- Recessing one material behind another changes how light falls on the surface.
This approach suits Johannesburg’s transitional climate, where cladding must handle both highveld sun and summer storms without losing its tactile character.
Color Strategies for Changing Perceived Scale
With wall cladding height, colour does more than decorate. It alters the geometry of the facade entirely. Darker tones absorb the highveld light, pulling a surface closer and making a two storey elevation feel more grounded. Lighter shades push the plane back, which is a useful trick when you want a tall profile to recede. The trick is to treat the cladding height as a canvas for optical adjustment, not just a functional barrier.
One strategy involves a gradient. A deep charcoal base transitioning to a pale grey upper band creates a sense of continuous ascent. The eye follows the colour shift upward, effectively stretching the wall cladding height beyond its physical measure. Lighter hues at the top catch the sun and add a layer of brilliance that makes the roofline feel lighter.
– Deep, saturated colours below the datum line anchor the structure to the earth.
– Mid tone shades in the middle band offer a transition that does not fracture the visual flow.
– High reflectance whites or off whites above the datum expand the perceived skyward reach.
The inverse works for sprawling single storey homes. Painting upper sections in a shade close to the sky or surrounding foliage confuses the boundary between construction and environment. This creates an illusion of a shorter wall cladding height, making the structure seem nestled into the landscape.
Another approach uses colour blocking to define separate volumes. A section of the facade in a dark, moody green at the entrance can visually reduce a soaring gable. Pairing this with a contrasting trim at the termination point redirects focus to the horizontal line, effectively capping the perceived height. Each paint colour should be sampled against the actual material at full scale, because the interaction of paint texture with fibre cement or steel changes the final read. The subtle absorption rates of different materials mean the same colour can look taller on one surface and shorter on another.
Ultimately, the selected palette dictates whether the wall cladding height becomes a dominating feature or a quiet backdrop. This decision shapes the home’s relationship with its site.
Cost Implications of Rising Installation Scope
A soaring wall cladding height remains a signature of modern South African homes, yet the cost of that ascent often surprises owners. The trend toward vertical emphasis has pushed installation scope far beyond simple ground level work.
Every additional metre requires reinforced scaffolding, longer labour hours, and careful handling of heavy panels. I have watched a modest double storey cladding project grow in price by nearly forty percent when the design shifted to full height!
- Ribbed metal profiles for texture
- Dark base tones with pale upper bands
- Asymmetrical panel layouts that break the grid
The stylistic options multiply, but each one carries its own cost implication, so a clear budget must guide the final choice.
Professional Installation and Maintenance Tips
Essential Tools and Equipment for Correct Setup
At a certain wall cladding height, the work becomes something else entirely. The tools you need change when ladders become scaffolds and hand tools become extended reach poles. My team learned this on a three-story facade in Cape Town.
For correct setup, especially when your wall cladding height pushes past the first level, you cannot work without:
- A rotating laser level to lock vertical reference lines
- A panel hoist or pulley system for lifting boards safely
- A torque-controlled screw gun with extended bits
- Edge clamps and suction cups for large-format panels
These items are not optional if you intend to keep your seams straight and your crew intact.
Maintenance shapes up differently at elevation. Higher installations resist casual visual checks, so you rely on binoculars or drone footage to spot failing fasteners. Plan for that access before the cladding goes up, not after the first storm loosens a corner.
Phased Installation Process for Taller Surfaces
One misaligned starter course at six metres up can cost a full day of rework. Wall cladding height transforms a straightforward task into a logistical puzzle, especially when you are working above the first level. The phased installation process for taller surfaces is about controlling both material flow and crew fatigue, not guessing as you go.
Break the facade into three bands: the lower zone, the transition zone, and the upper reach. Each band demands a different anchor sequence and panel handling method. Locking the base course first gives you a dependable reference for everything above it. From there, work upward in strict order.
- Verify the starter track against a rotating laser on the lower zone.
- Complete all edge trims and flashings before moving higher.
- Use extended reach poles and a pulley system for the transition zone.
- Finish the upper reach with drone footage to confirm seam alignment.
That sequence prevents wasted motion and rework. On a three storey residential block in Pretoria, we skipped the chalk line between zones and paid for it with a bowed corner. Respect the wall cladding height, and it will respect your timeline!
Frequent Mistakes That Lead to Failure or Warping
Professional installers know that wall cladding height exposes every shortcut. A common mistake is rushing the substrate preparation on the lower band just to reach elevation sooner. That leads to drummy panels and eventual warping. I have seen boards fail within a year because someone used galvanised nails on aluminium. Corrosion breeds movement.
Thermal movement is the silent killer at height. When panels lock into rigid tracks without expansion gaps, they buckle under the African sun. Always use slotted holes and matching washers. Torque the fasteners to spec; overtightening crushes the thermal break and transfers stress to the cladding.
Frequent errors include
- Ignoring flashing joints at floor lines, letting water wick behind the facade.
- Mixing metals that cause electrolytic reaction on the same elevation.
Those mistakes show up as oil canning and edge lift. The best tool is a written sequence, not a memory. Wall cladding height does not forgive guesswork, but it rewards a calm, methodical approach.
Routine Inspection and Cleaning Recommendations
Wall cladding height demands a maintenance rhythm most building owners ignore until moisture stains appear. Higher elevations face punishing sun and wind on exposed edges. Routine inspection should happen twice per year, after the rainy season and before dry winter winds.
Start with a visual walk around the base to spot discolouration or mineral deposits. Then check the fixings. Loose fasteners on high elevations signal trouble before any visible gap appears. Cleaning requires plain water and a soft brush, never a pressure washer, because the jet forces moisture behind the panels.
When inspecting, give priority to these zones:
– Flashing junctions at parapet walls
– Expansion joint fillers that have dropped
– Sealant lines with hairline cracks
A sponge test on the lower course reveals whether weeping holes remain clear. Wall cladding height changes how often you need to look, not what you need to look for.
Signs You Should Consult an Expert Rather Than DIY
Wall cladding height stops being a design variable and becomes a structural question. A two-storey project on a Cape Town home may tempt the DIYer, but the consequences of a mistake multiply with every metre you rise. Wall cladding height changes what you can see from the ground, and the expert knows what your eye will miss.
Consult a professional before you start if you notice:
- Any deflection in the substrate when you press on it
- Corrosion behind the panels that is not visible from the outside
- Gaps between the cladding and the flashing that have opened on their own
Ignoring these signs is not courage, it is routine denial. I have seen homeowners dismiss a minor gap, only to face a full panel replacement months later. The professional has the equipment to test fixings under load and the training to tell a settling wall from a failing anchor.
Extending Service Life Through Repairs and Refinishing
Proper installation determines how long your cladding survives the Cape elements. When repairs become necessary, the wall cladding height influences the approach. A low accent wall allows simple touch ups, while higher installations demand scaffolding and careful work at elevation.
Refinishing extends service life when you address the root cause first. Loose fixings, failing sealant, or water staining will reappear through fresh paint if ignored. Strip back to the substrate where damage exists, treat corrosion, and replace any warped panels before recoating. The repair should match the original specification, including fastener spacing and thermal movement allowances. I always tell clients to budget for the unseen, because the visible surface rarely tells the full story.
A practical maintenance checklist keeps things honest:
- Inspect flashing and corner trims after storm season
- Check sealant joints for cracking or separation
- Confirm fixings remain tight without overtorquing
This routine catches small failures before they threaten the whole elevation, and it saves you from a full strip down later.

0 Comments